Showing posts with label baking. Show all posts

Scrumptious Snickerdoodle Cookies

It has been a really long time since I posted a "Sundays with Liliana" recipe.  This isn't to say that Liliana and I don't still bake all the time, I just haven't had the patience to take the pictures, make up a recipe through practice, etc.  Every time I post a recipe here, it's ours - Liliana's and mine.  We make tons of different variations and then put our own spin on it (she usually suggests more sugar and butter, but I must admit, she's usually right! More butter is always a good thing). 

This week though, I made snickerdoodle cookies twice (b/c we just eat the entire batch too quickly!) and this recipe is just the best there is.  It's quite easy, fool proof, and a big hit with kids and adults alike.

Scrumptious Snickerdoodle Cookies


Before you get started:
(for those of you that are new, I always start my recipes off with baking tips and a "before you get started" section b/c I am so sick of getting half way through a recipe to find my butter was supposed to be room temperature ... NOW ya tell me! ;)
 
 (1) Take your butter out BEFORE starting.  It needs to be room temperature (which can be done in a microwave (usually only for 15 seconds)) but having it room temperature, if you can, is usually better!
 
 
(2) allow a couple hours before you need these to be ready!  The dough will be in the fridge for an hour!  Don't set your oven yet!
 
Ingredients: 
 (1) 1 c. salted butter (at room temp)
(2) 1 c. white sugar
(3) 1 c. dark brown sugar
(4) 2 eggs
(5) 3 teaspoons vanilla
(6) 3 cups flour
(7) 1 teaspoon salt
(8) 1 teaspoon baking soda
(9) 2 teaspoons cream of tartar
(10) after dough has refrigerated: 
1/4 c. sugar & 2 teaspoons cinnamon 

Directions:
 
 (1) Put your butter and white sugar and mix well (for about 3 minutes on medium speed).
(2) add the brown sugar and mix.
(3) add the egg and vanilla and mix.
(4) combine the remaining ingredients in a separate bowl.  Slowly put the dry ingredients in to the bowl with the egg (in four helpings - put a fourth in the bowl and mix, and repeat)
(5) let the bowl cool in the refrigerator for an hour
(6) roll the dough in to small balls and then roll the ball in the mixture of sugar and cinnamon
 
 
(7) bake cookies at 290 degrees (or 300 for a non-dark coated cookie sheet) for 13 minutes.  No more! These are best nice and soft!


Pumpkin Whoopie Pies - Sundays with Lili

As I've written in the past, my 3 year old daughter and I bake every Sunday.  I love baking, she loves helping, I love having her help and we make some delicious desserts.  It's a win/ win situation.  These Mommy / daughter afternoons have turned in to quite a tradition, so these weekly installments will be called ...


 Sundays with Lili
"tackling each recipe 1 cup at a time"

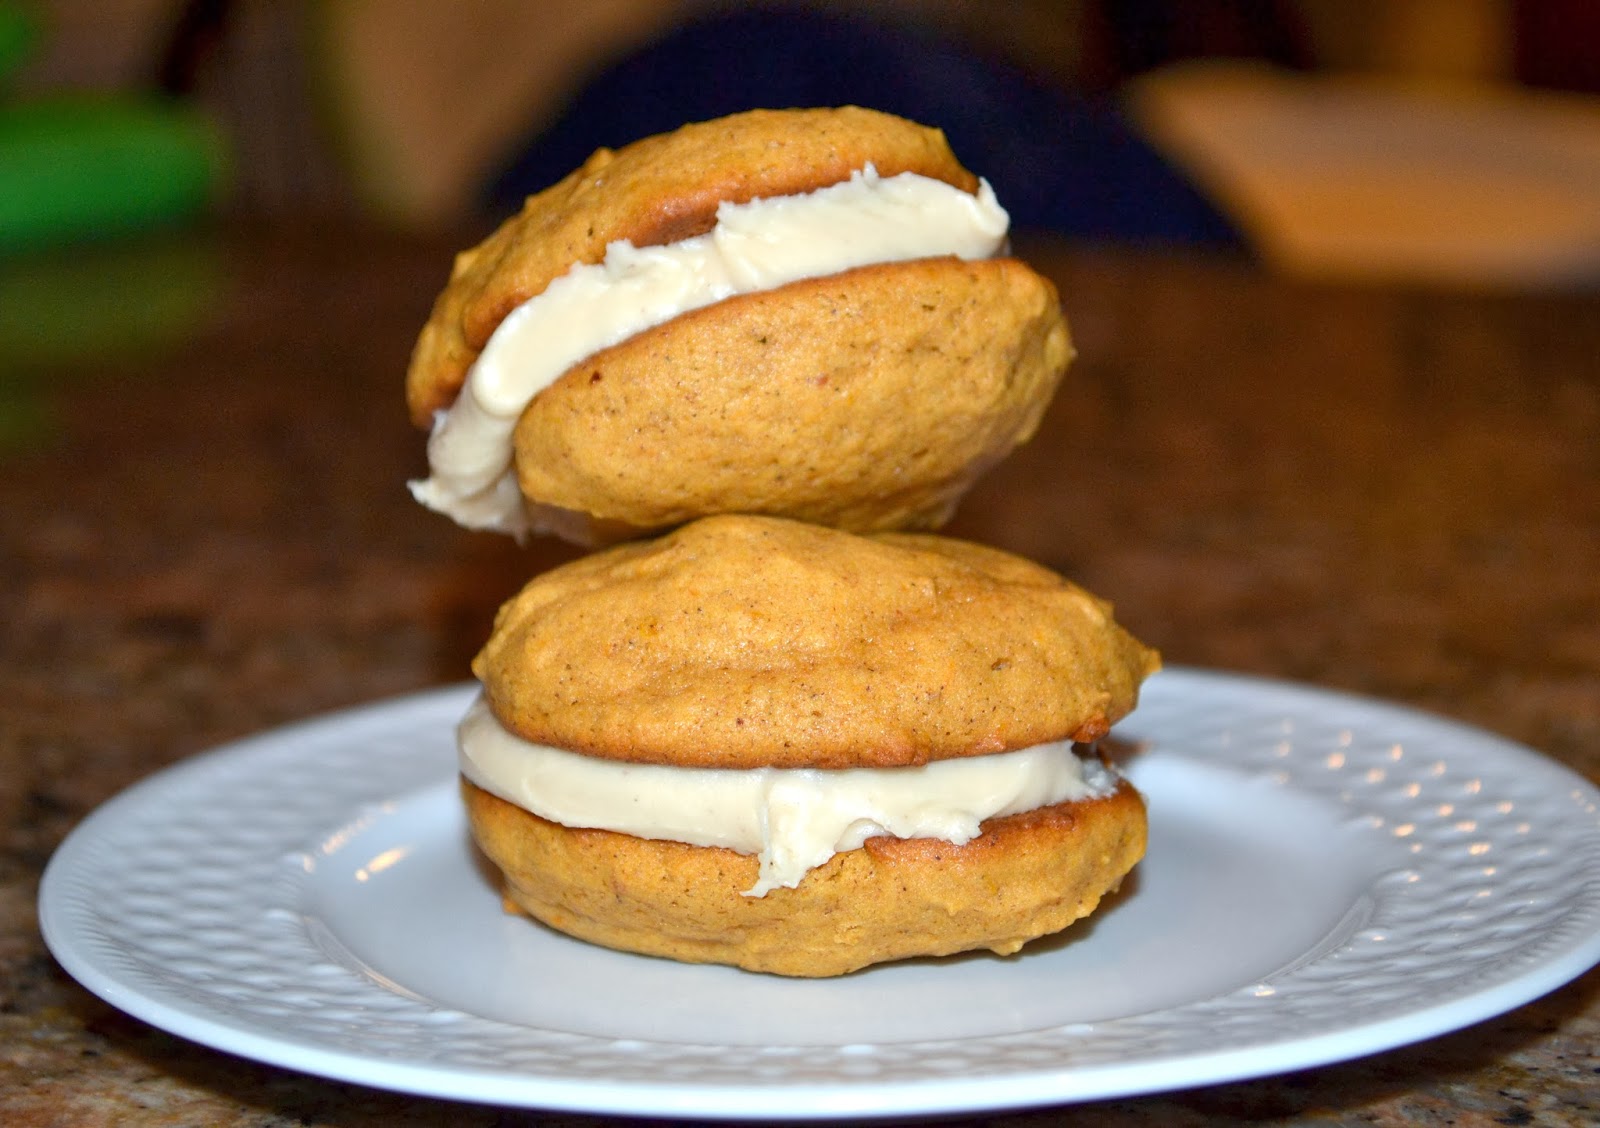
This week L & I made some "Pumpkin Whoopie Pies."For the last few years, my Thanksgiving "job" has been providing the desserts.  I always try to mix it up, but inevitably feel like I end up making pies, pies, and more pies. This year, I wanted to start practicing and changing things up a little.  Why not make a cookie whoopie pie and bring that as part of our Thanksgiving dessert spread?  The cookies are just so moist, so delectable, and a total treat.  As L said "mmm, mmm Mommy, now these are some cookies that I can fall in love with!" 

Pumpkin Whoopie Pies


Before you get started
(for those of you that are new, I always start my recipes off with baking tips and a "before you get started" section b/c I am so sick of getting half way through a recipe to find my butter was supposed to be room temperature ... NOW ya tell me! ;)

 (1) Take your butter out BEFORE starting.  It needs to be softened (which can be done in a microwave) but having it room temperature, if you can, is usually better!
(2) Preheat your oven to 15 or so degrees less than most recipes call for and set your timer to at least 1-2 minutes less and then check on them regularly for the first batch.  Once you have it figured out, the other batches will probably be the best ones!

(3) Note that when making the frosting, you have to let it cool for a while before finishing.  SO plan some time to make the frosting.

Ingredients

COOKIE
- 2 1/2 cups flour -
- 1 teaspoon baking soda -
- 1/2 teaspoon salt -
- 2 teaspoons cinnamon -
- 3/4 teaspoon ginger
- 1/2 teaspoon nutmeg -
- 1/2 c. white sugar -
- 3/4 c. butter (softened)-
- 1 1/2 c. brown sugar -
- 2 eggs -
- 2 teaspoons vanilla -
- 12 oz. pumpkin (from the can) -
- 1/4 c. evaporated milk -

FROSTING
- 4 teaspoons vanilla -
- 5 tablespoons butters -
- 4 cups confectioners sugar -
- 1/3 c. packed brown sugar -
- pinch of cinnamon - 
- 1/3 c. evaporated milk -
- about 1/4 c. milk (just do as necessary -

Instructions

(1) Place the flour, baking soda, baking powder, salt, cinnamon, ginger, nutmeg, and sugar in a bowl.  Set aside.


(2) Place the butter and brown sugar into a mixer.  Mix it for a good long while (about 3 minutes). Scrape down the sides (L's favorite job).  Make sure it's nice and whipped.


(3) Next place the pumpkin, evaporated milk, and vanilla in.  Be warned it looks kinda nasty.  Mix it until it's thoroughly put together.


(4) Slowly (piece by piece) add in the flour mixture.  Put in 1/4 of the flour, beat on medium for 1 minute and repeat until you're done.


(5) Scoop the cookies on to your cookie sheet (and remember, buy a silpat!  BEST baking invention ever. Well, my kitchenaid is #1, but the silpat is a close 2nd).  Get a decent scoop on there.  They don't expand too much so make sure they're plenty big to make them in to whoopie pies.

(6) Bake them for about 11 minutes.

(7) While in the oven, let's start the frosting, shall we?  Make sure the cookies are cooled before putting it on the cookies.  But that way this gives you plenty of time to "sample" the frosting.  In a saucepan, on medium heat, place the butter, evaporated milk, and brown sugar.  

(8) Once it melts, place the vanilla and then take off the stove top and let cool.


(9) After it's cool, place it in the mixer with the confections sugar and the cinnamon.  Depending on consistency, add milk to make it your desired texture.  You don't want it to be too runny, but I usually add a few tablespoons.

(10) Take one cookie, place frosting, take the other cookie and place on top.  Say yummy and eat.


Sea Salt Delights

I've got another wonderful recipe to share today - sea salt delights!  This recipe is basically a mix of three recipes I've seen - I tweaked it to sea salt delight perfection!


SEA SALT DELIGHT PERFECTION

'BEFORE YOU GET STARTED!'

(1)  lay the butter out to soften before getting started!


(2) note that you have to refrigerate the dough for about 45 minutes before putting it in the oven.  Time that out! :-)

(3) Don't you dare not put that sea salt on there.  I know sometimes people change out ingredients to work with what they've got.  Well I'm not lettin' ya.  Imagine me going through this computer and yelling "you need the sea salt!"  The cookies won't be the same without them. 

Remember my trick - set the oven to 15 degrees less than recipes call for!  When you take cookies out, you let them stay on the cookie sheet for 5 minutes.

INGREDIENTS 

-1 cup packed light brown sugar-
- 1 cup white sugar-
- 2 sticks (1 cup) salted butter (softened)-
- 2 eggs -
- 4 teaspoons vanilla-
- 2 1/2 c. all-purpose flour -  
- 1/2 c. unsweetened cocoa powder -
- 1 teaspoon baking soda- 
- a bag of rolo candies-
- white sugar (to roll cookies in) -

INSTRUCTIONS 

(1) In your mixer, combine the white sugar, packed brown sugar, softened butter and beat.
(2) Once mixed well, add the eggs and vanilla.
(3) In a separate bowl, combine the cocoa, flour, and baking soda.
(4) Slowly, combine the cocoa addition to the sugar mixtures.

*side tip: I typically add it in 4 parts --- put some cocoa powder, mix for 30 seconds, repeat until you're done! Makes a HUGE difference to just take the extra 2 minutes*

(5) Refrigerate your dough for about 45 minutes.  


(6) Preheat your oven to 375 degrees.
(7) Take a hunk of the dough & put a rolo around (in other words, surround the dough around the rolo).   Make sure to cover the rolo completely.
(8) take the ball of dough with the rolo inside and roll it in white sugar and do for all.
(9) With your hand, slightly press down on the cookies.  
(10) Put sea salt on top of the cookies. 


(11) I recommend using a silpat (I'm obsessed) or some kind of parchment paper.
(12) Bake the cookies for about 9 minutes.  They're ready when you see them start to crinkle.
(13) Leave them on the counters for 5 minutes to still cook a tiny bit and then you can remove and EAT! 

 Having some milk on the side is recommended.


 ENJOY!


Pumpkin Cheesecake Perfection Bread

It's finally time to share my first recipe on this blog!  My daughter and I bake a little something together every Sunday.  It's just a fun tradition I started a few months ago and has been a blast.  I've always had a dream to own a bakery.  Therefore, I bake, I tweak, I devour ... it's pure awesome. Instead of just enjoying the goodies for ourselves, I've decided to frequently share the recipes here!

Here's how I plan on sharing recipes.  At the beginning of every recipe, I'll share some "before you get started" tips.  Nothing is worse than being midway through a recipe and seeing a secret egg that wasn't in the ingredients.  At that point I usually have to bat my eyelashes and ask my husband super sweetly to go back to the grocery store for a sole egg.  Trying to avoid using our eyelash trick unless it's necessary, the tips will provide for much headache free baking and that's the only way we want it!

PUMPKIN CHEESECAKE PERFECTION

'BEFORE YOU GET STARTED!'
(1) put your cream cheese out to soften.  open the package and let it sit out on your counter.


(2) Melt 3/4 c. of butter in the microwave and let it sit out to cool down.  
This takes a while so do it first!

(3) Set your oven to 335 degrees.  
A trick of the trade:  ALWAYS set your oven 15 degrees less than the recipes call for.  In this case most call for 350, but I put it to 335.  
This lets things cook a little slower and not burn your baked goods!

INGREDIENTS

- 2 1/2 cups + 2 tablespoons flour-
- 1/2 teaspoon salt-
- 1 1/4 teaspoons ground cinnamon-
- 1/4 teaspoon ground nutmeg-
- 2/3 teaspoon baking powder-
- 2/3 teaspoon baking soda-
-1.5 cups sugar (granulated white)-
-3 large eggs-
- 3/4 cup salted butter, melted and cooled-
-1/3 cup water-
-12 oz can pure pumpkin-
-1.5 teaspoons vanilla extract-
-6 ounces of cream cheese, to room temperature-

INSTRUCTIONS
(1) Look above at the tips and do those: preheat oven to 335 degrees, take out cream cheese, melt your butter and leave out to cool

(2) Grease your bread pan (I'm a big fan of the flour spray!  Works WONDERS!)

(3) In a large bowl put together the following ingredients for your pumpkin bread mix: flour, baking powder, baking soda, salt, cinnamon, nutmeg & sugar.  It should look like this:


(4) In another bowl, put the liquid items (plus sugar): the pumpkin can, eggs, sugar, melted / cooled butter, water and vanilla together.

 (5) Then slowly add the pumpkin mix to your flour mixture in the kitchen aid.  Put it in about 4 pieces ... pour some in and mix for 30 seconds on medium and repeat the process.

(6) Put one third of the mixture in the bread pan and then make a layer of cream cheese on top.  Just cut the cream cheese and smoosh with your finger to put it on top.  The inconsistency in texture and thickness of the cream cheese will taste amazing!  You're going for something like this:


(7) Pour another portion of the batter and put the cream cheese again.  Put the remaining batter on top.  Basically from bottom to top it should be: batter, cream cheese, batter, cream cheese, batter.

(8) Bake for about 55 minutes.  Just test by making sure the pumpkin mixture comes out clean when you poke it.  It won't come out totally clean b/c of the cream cheese.
Right when it comes out of the oven take a knife and slide it around the bread so it separates.  Then let the bread for cool for 10 minutes.  Invert it on to a cooling rack and let sit for another 10 minutes.  After that you can wait if you'd like .... OR ... you can EAT it! :)


Stay Connected

The Archive

Categories